How to Photograph the Wedding Details Photos

Hey wedding photographers! This post is for you! Do you struggle with photographing wedding details? Look no further! I want to share with you some tips and tricks on how to photograph the wedding detail photos!
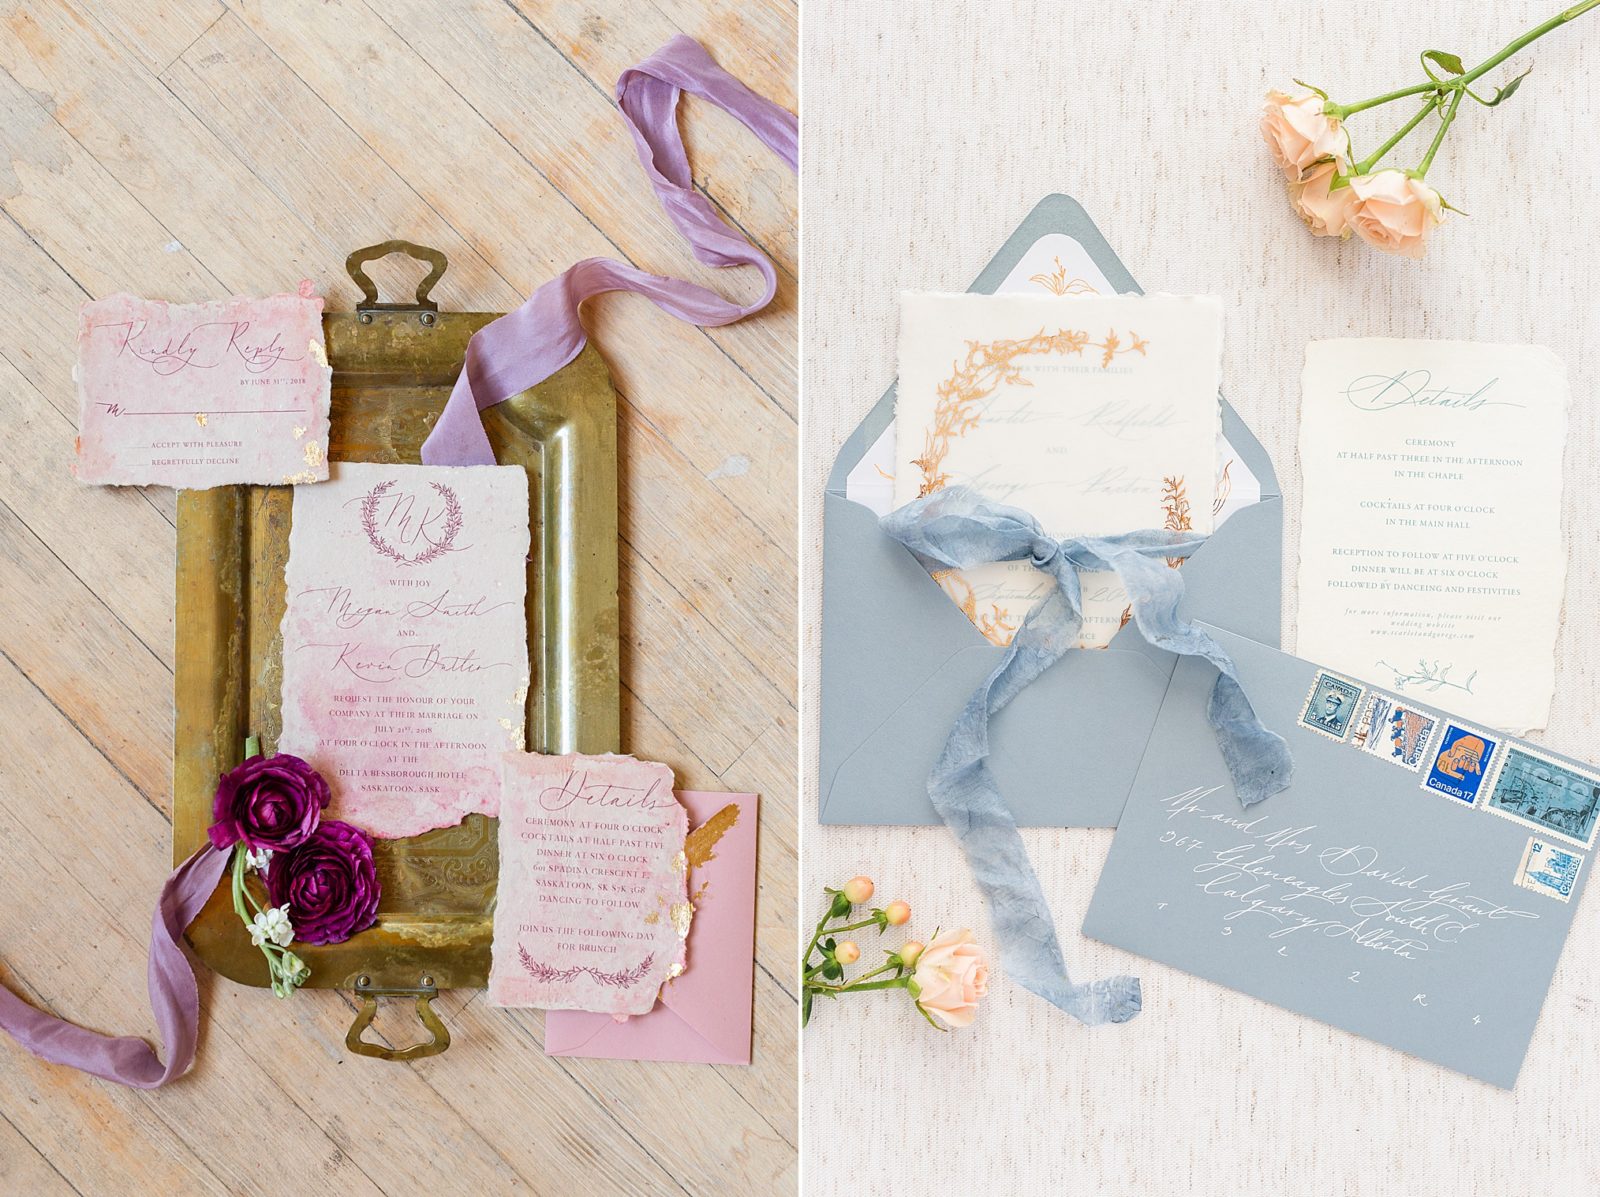
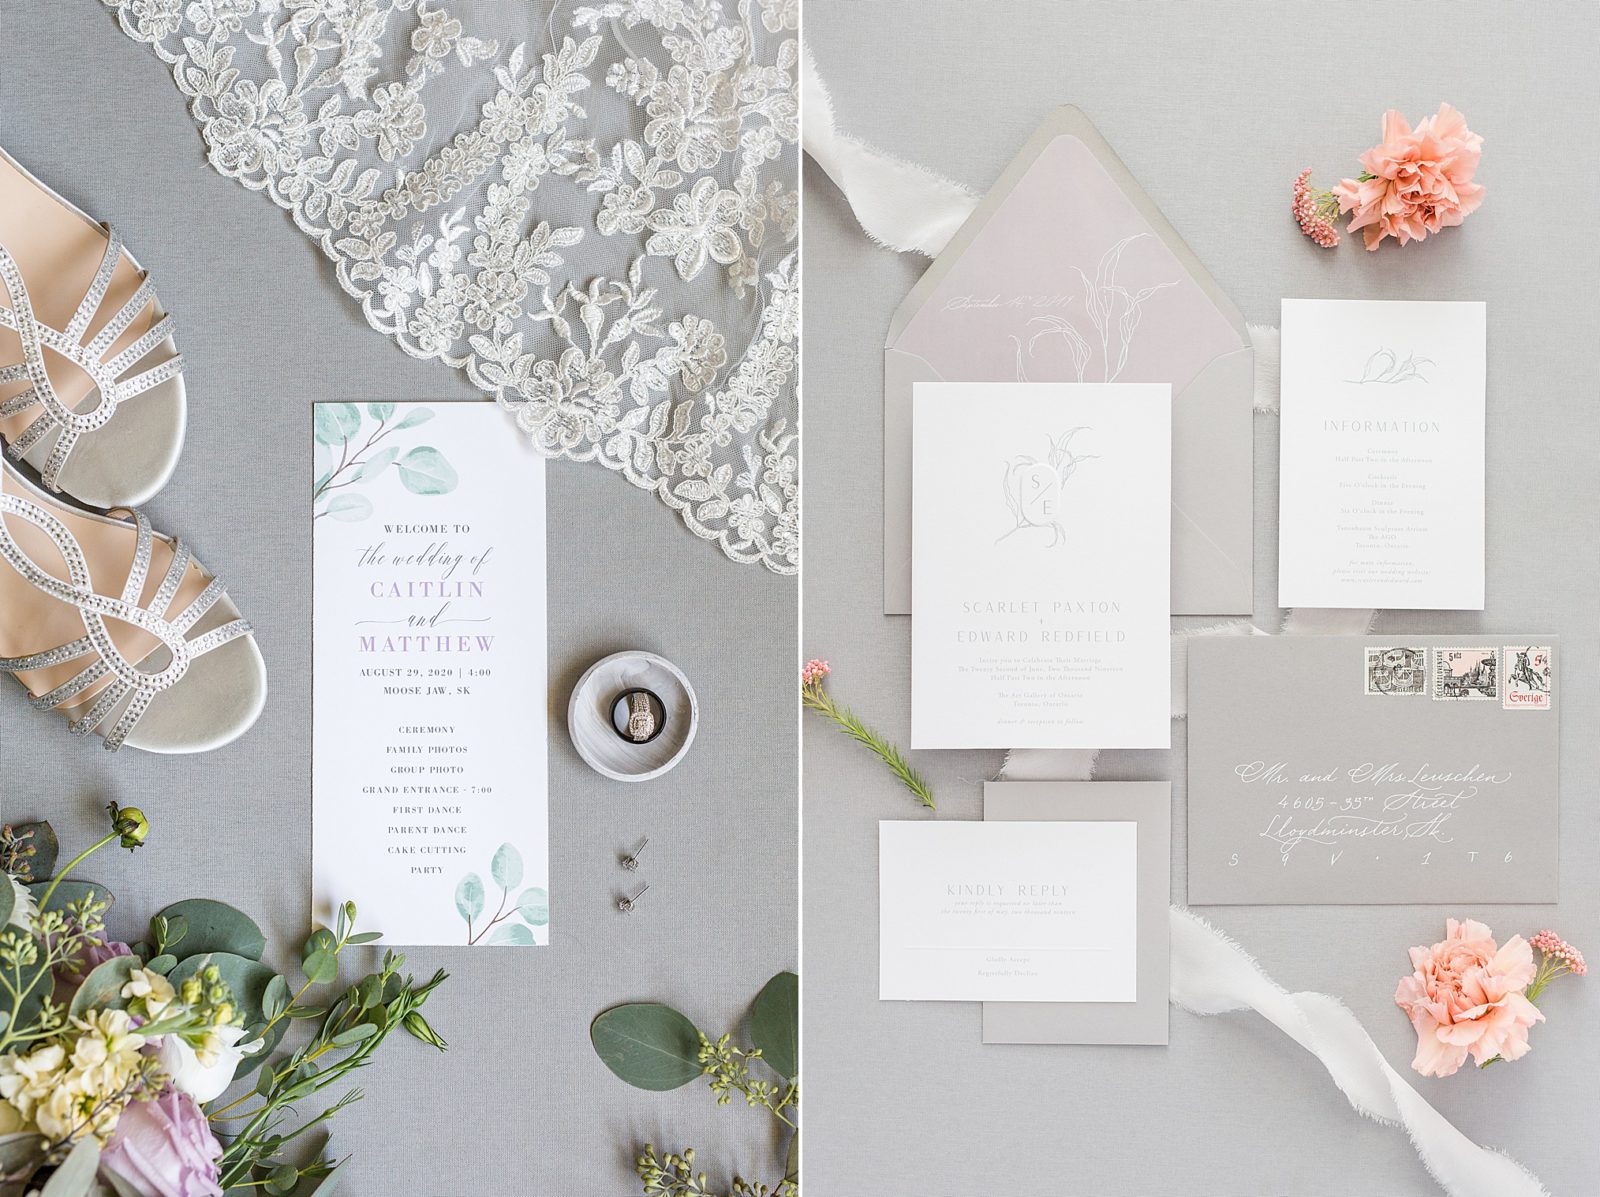
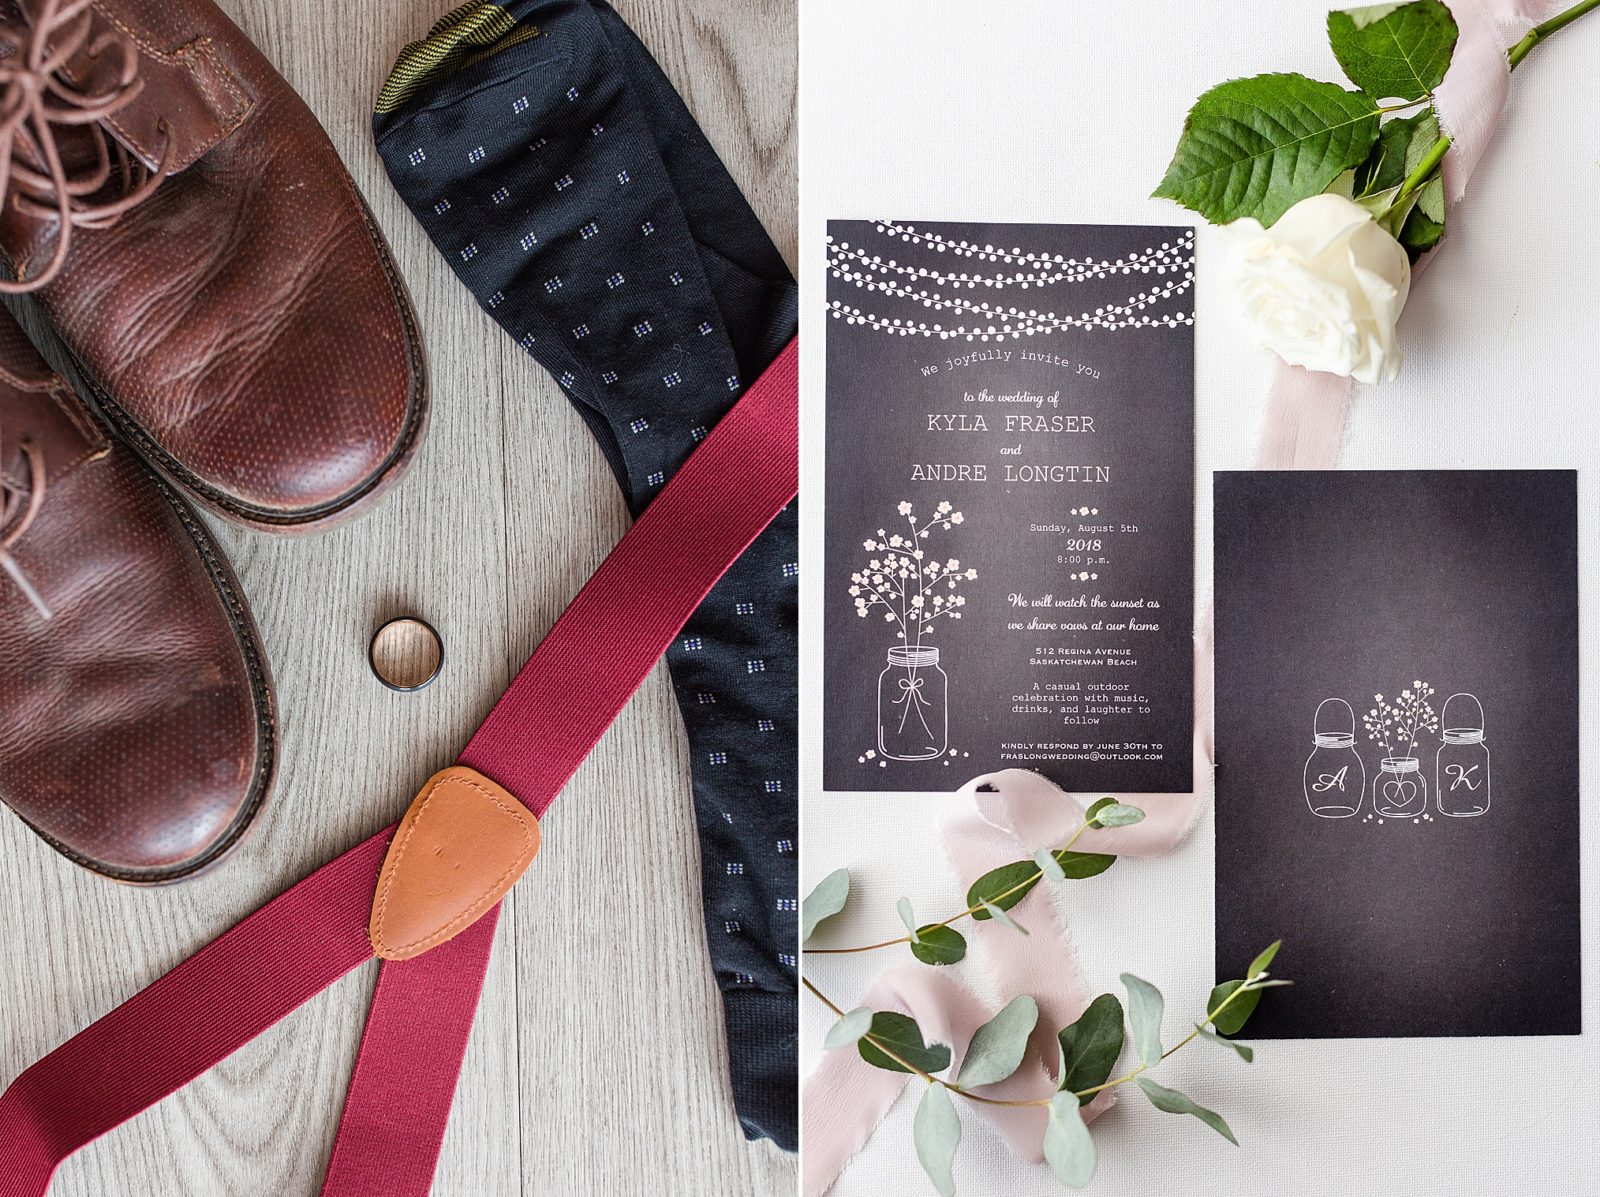
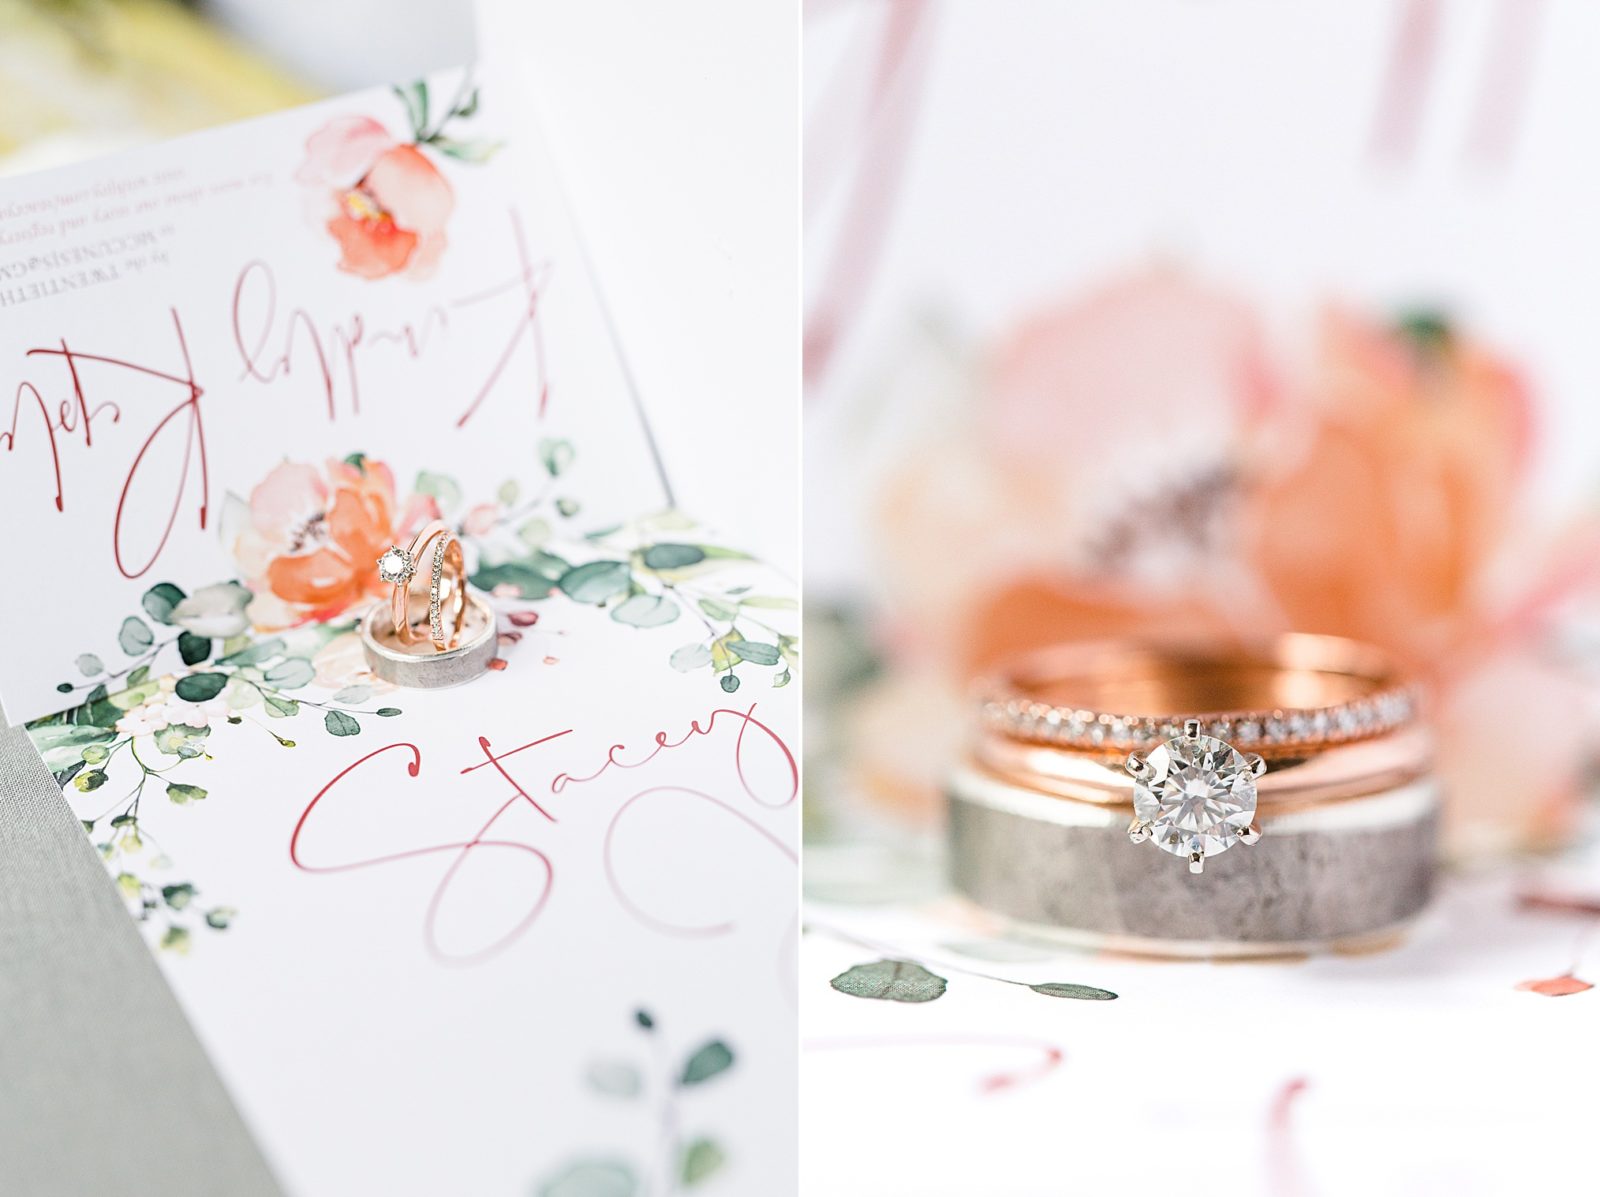
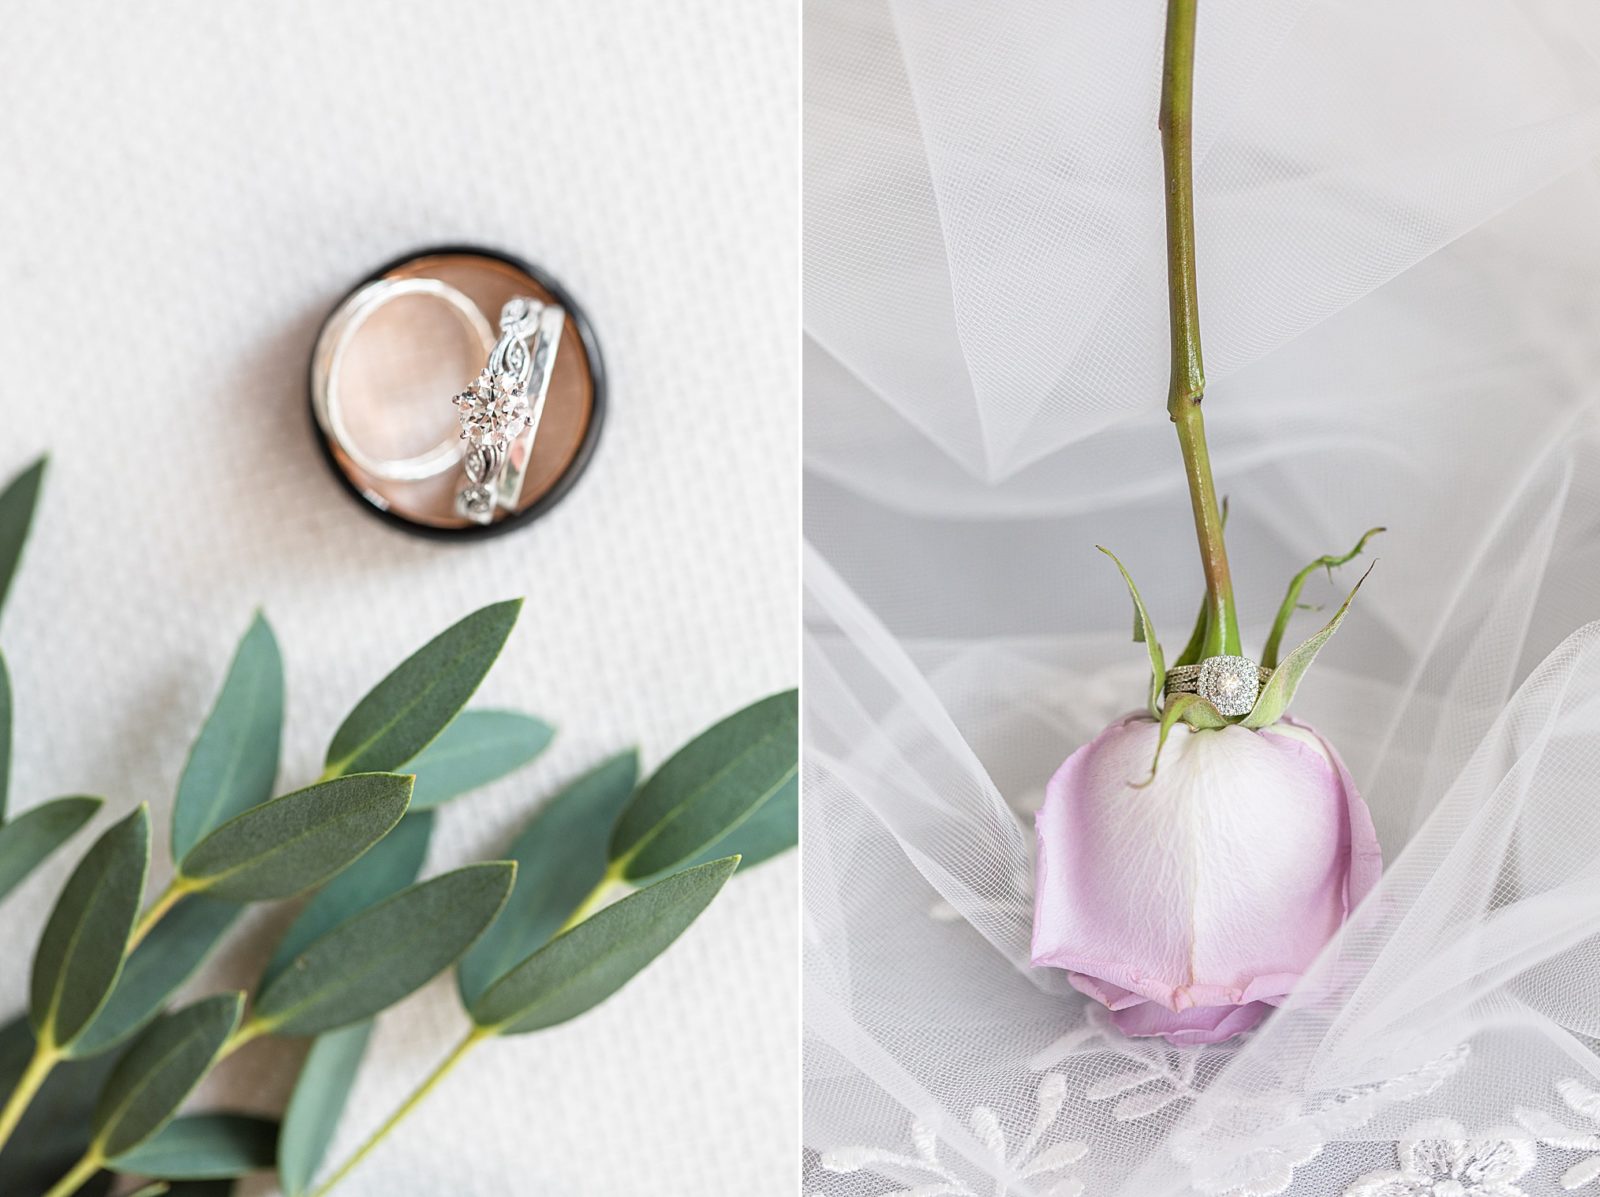
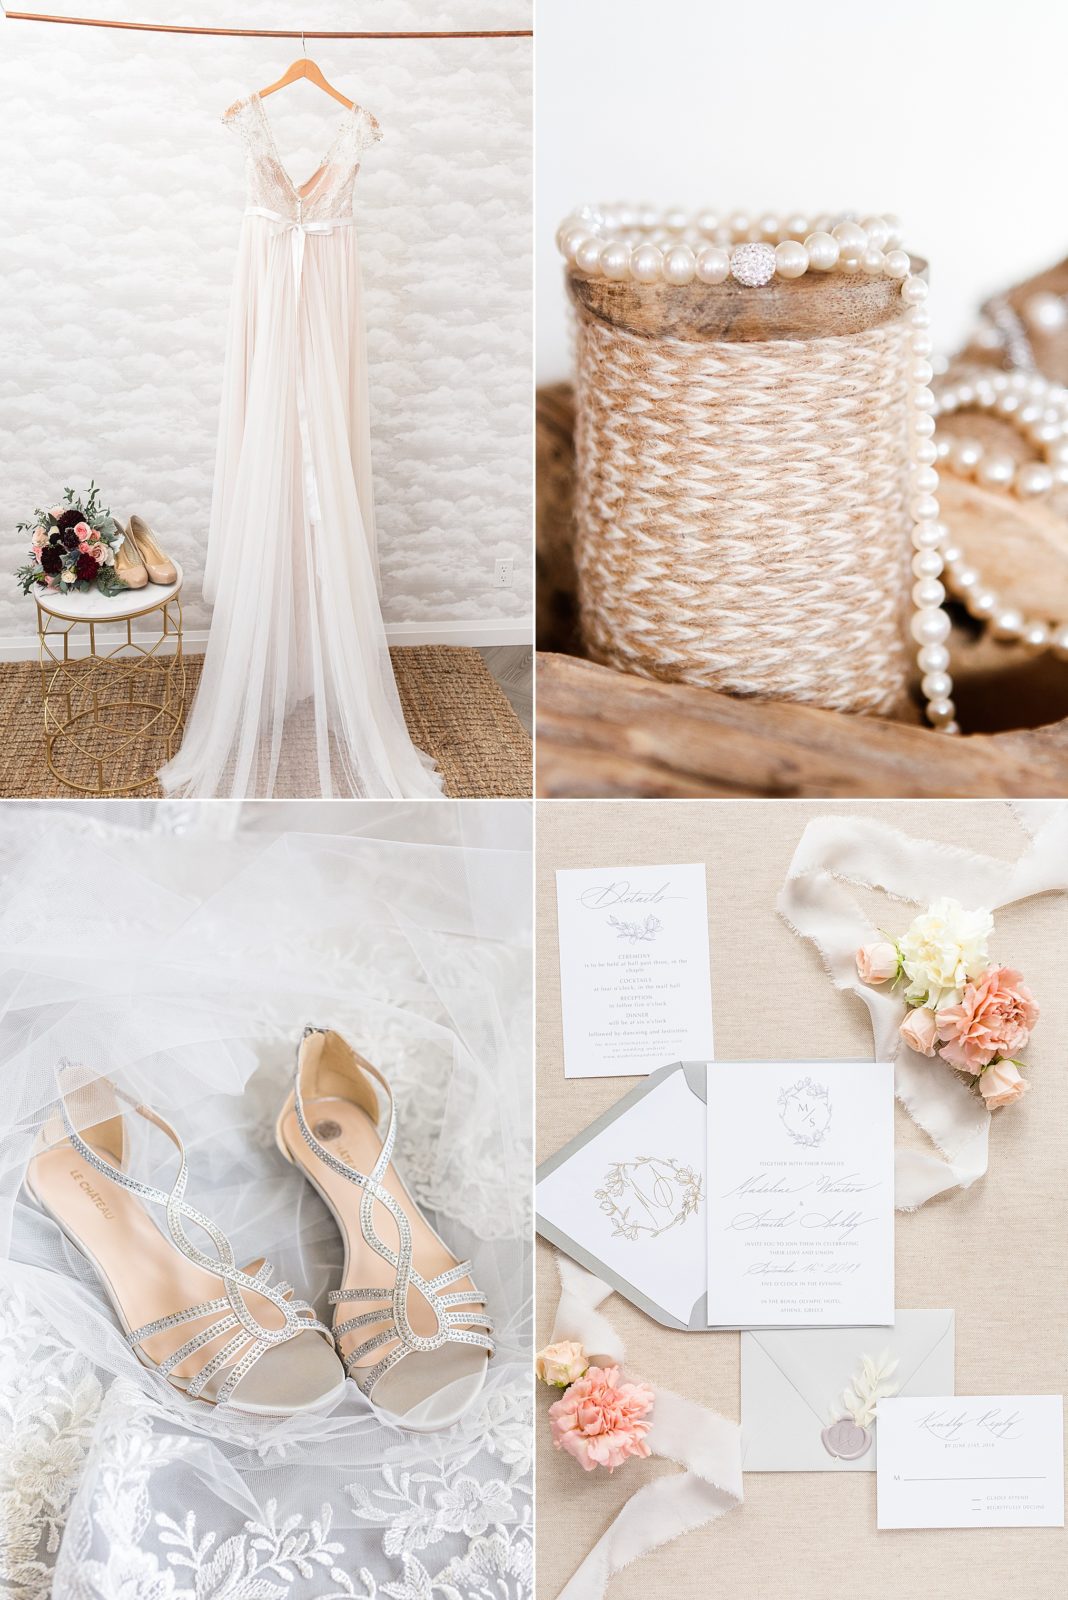
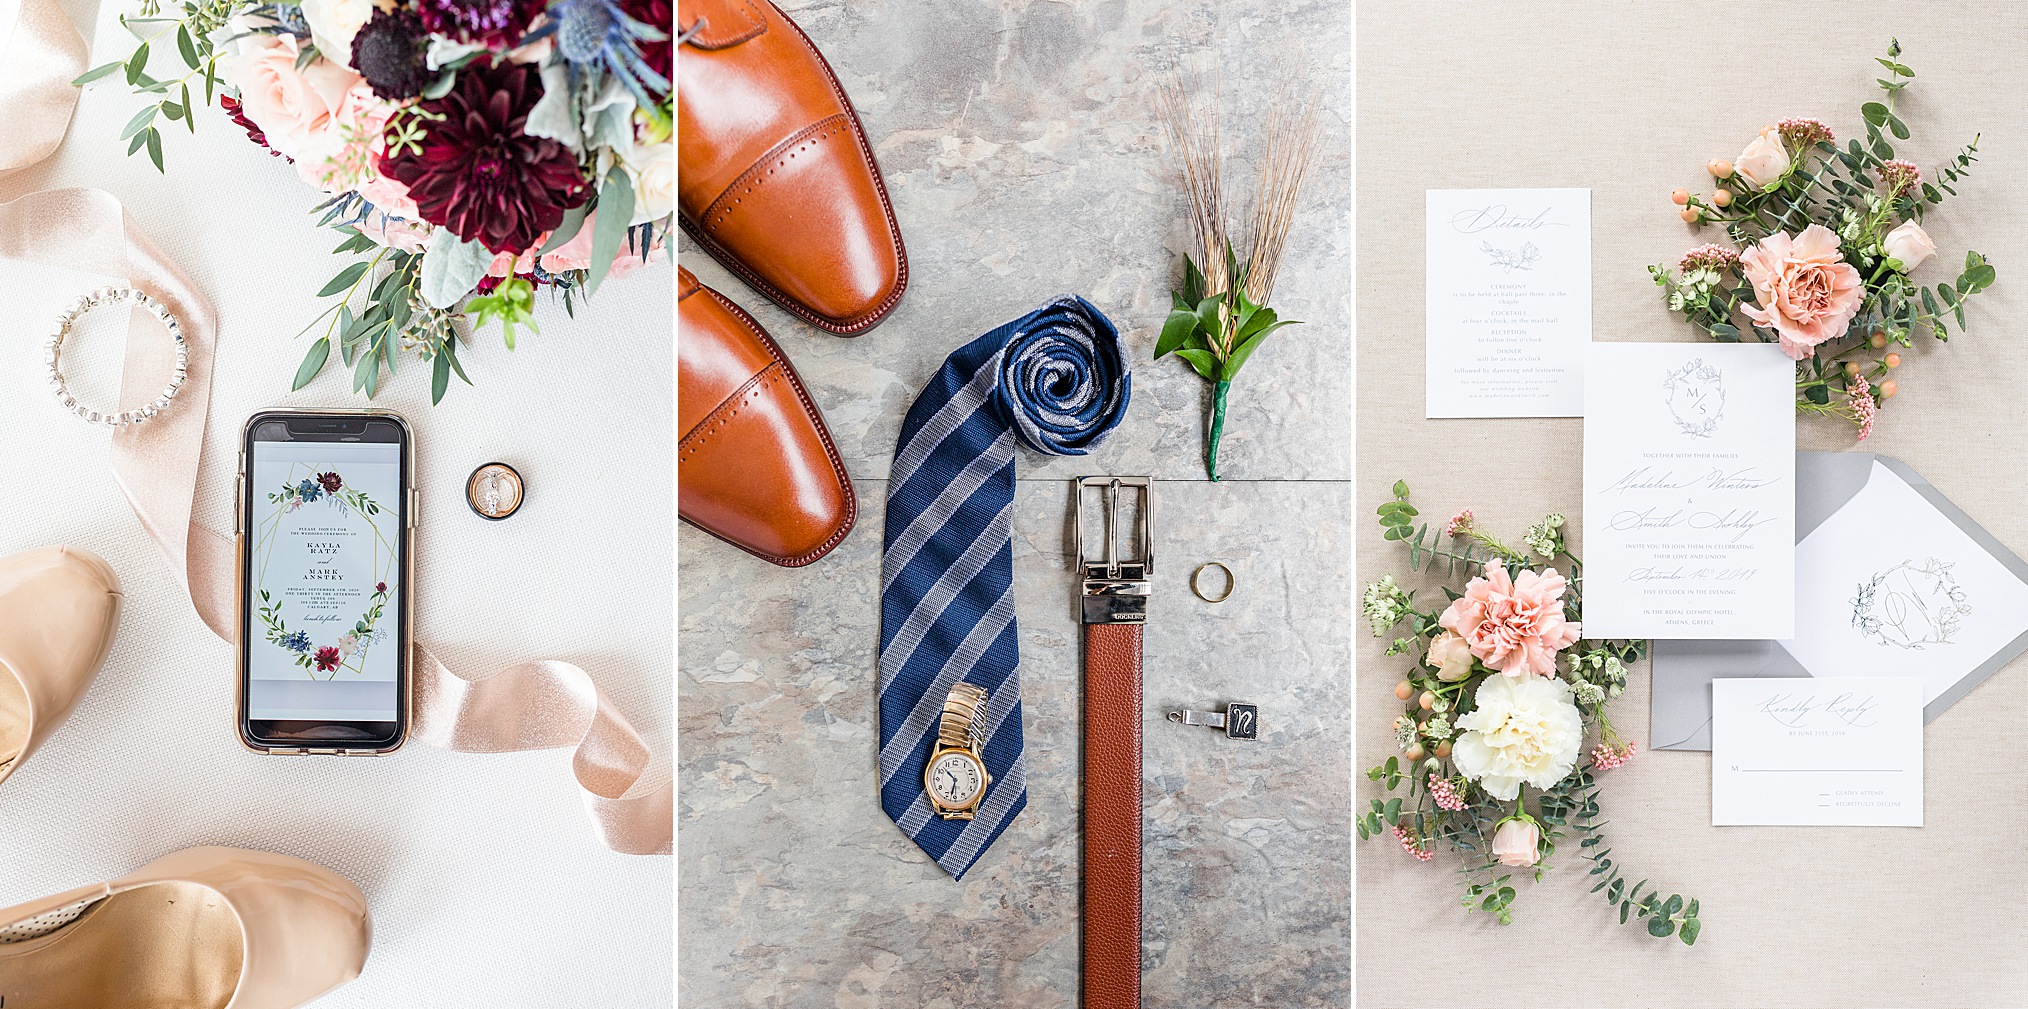
If you are anything like me, photographing wedding day details is one of my fav parts of the day! Details include getting gorgeous images of the bride’s invitation suite, jewelry, shoes, perfume, dresses, rings and more – and these images set the tone and start the story for the rest of the wedding day!
But sometimes these details can get lost in all of the shuffle and busyness of the wedding day. You’re dealing with a lot of people, trying to stay on time for everything, all while trying to remember the technical information that goes along with nailing every shot.
Capturing wedding details is so important for several reasons: these small details were chosen by your clients for a reason and are important to them; blogs and other publications love when detail shots are included to showcase the vendors. You’re more likely to get published when you have those shots. And lastly shooting details first on the wedding day gives you time to warm up and get in the right headspace to have an AWESOME day to love, bless and serve your bride and groom!!
Here are a few tips for photographers on how to photograph the wedding detail photos.
(Brides, scroll to the bottom to see a list of items to have ready for details photos!)
1. Make sure the couple include detail photos in the timeline!
While building the wedding-day timeline, explain to your clients why these details are so important, and include some time in the morning dedicated to capturing these images. Most photographers will do this when they first arrive at the bride or groom’s getting-ready location.
BONUS TIP: Arrive a bit earlier than when you’re supposed to start shooting based on the timeline. This will give you time to scout locations, get your gear all ready, and devote time to gathering details if your client has not already done so!
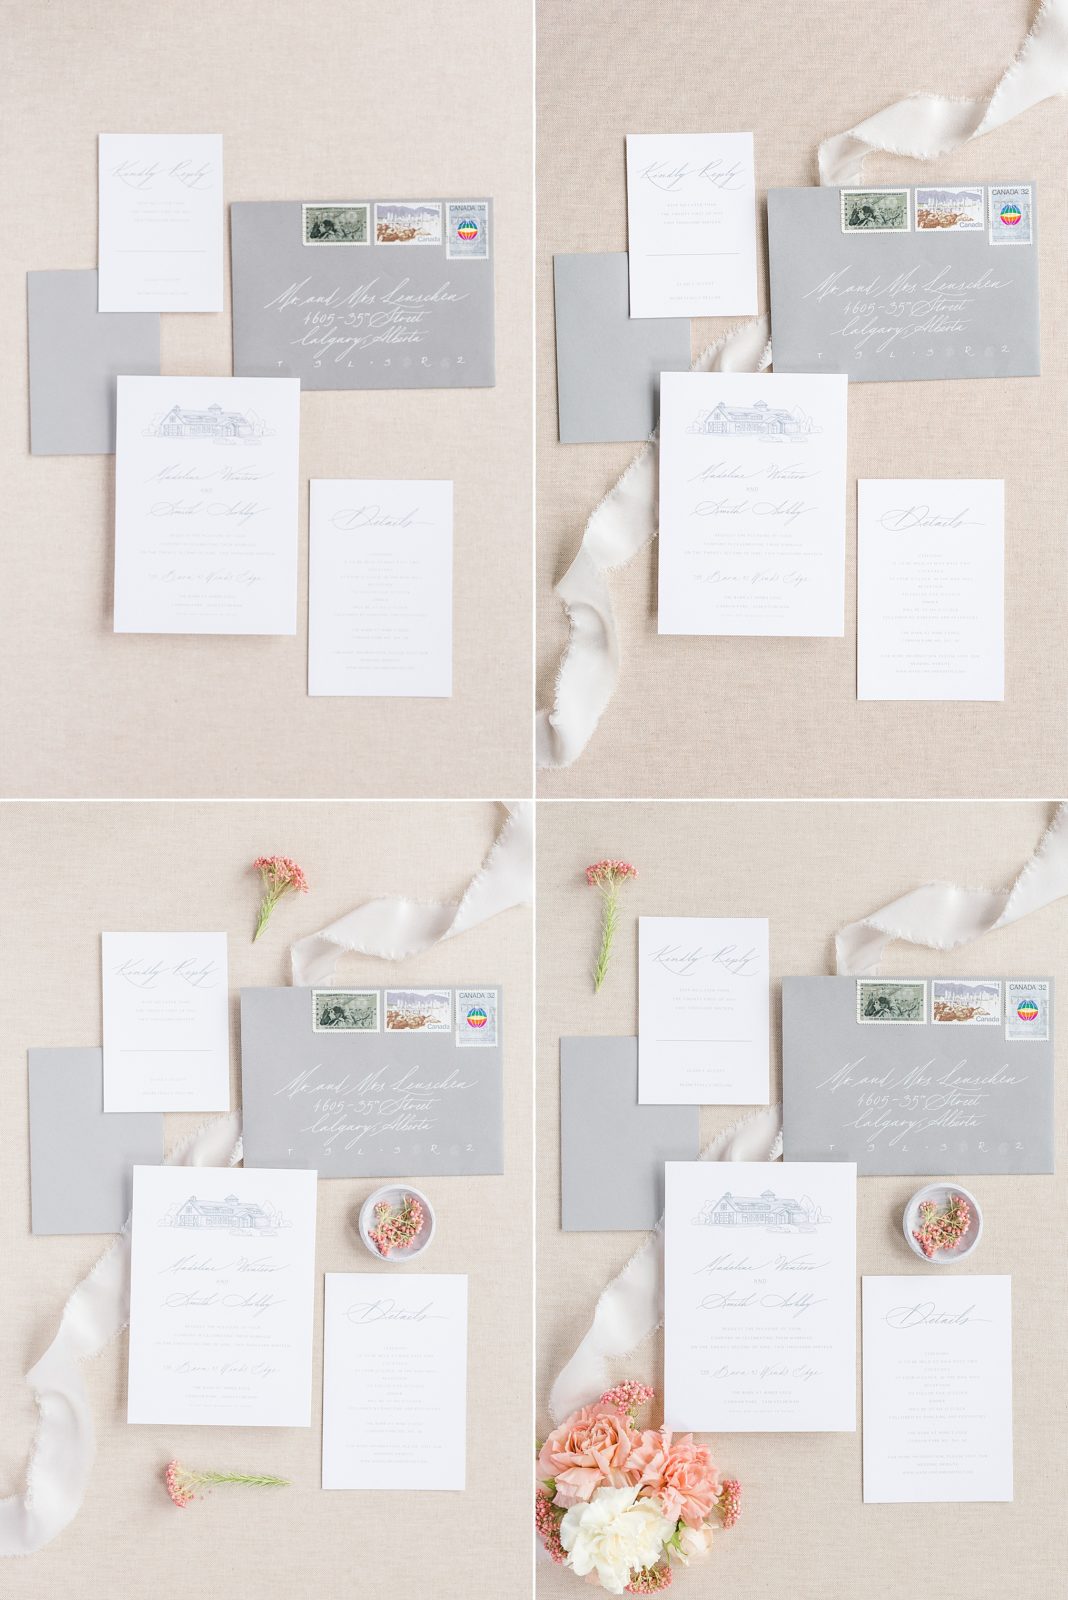
2. Create a Style Kit
Early on in my business, I shot weddings that didn’t necessarily have a ton of details—and that’s totally okay! In order to make those images look more high-end, I bring several objects (a styling kit) that includes things like a variety of colors of loose ribbon and objects that add texture or dimension like flowers, greenery, lace, bowls or other random objects. I do also use brides details to make it unique to the couple like her ear rings, veil as lace, loose flowers from her bouquet, etc. This helps to make a simple invite photo look high end or more visually pleasing.
Below my items were the little ring dish and the white ribbon.
Below is an example how these styling items really make an impact to the final image creating visual interest! The first image there is only the invite to tell the story. But the other images as I added elements, we got more of the story (the colors of the day and the style of wedding by the flowers) and it creates a more interesting image.
Bonus: When putting ribbon down, go at an angle – it’s more eye pleasing. And try to make the ribbon have some folds or twists for more visual interest.
3. Use the wedding dress or bridesmaid’s dress as the background or use a styling mat
I love doing this when I’m shooting details on the wedding day because it incorporates the couple’s wedding colors and overall theme/aesthetic! All of the images will feel cohesive when you deliver the final gallery or share the images on your blog! If you don’t have a chance to use the bridesmaid dresses, use a plain surface or a styling mat for less distracting backgrounds. Using the brides dress or veil is also a great idea!
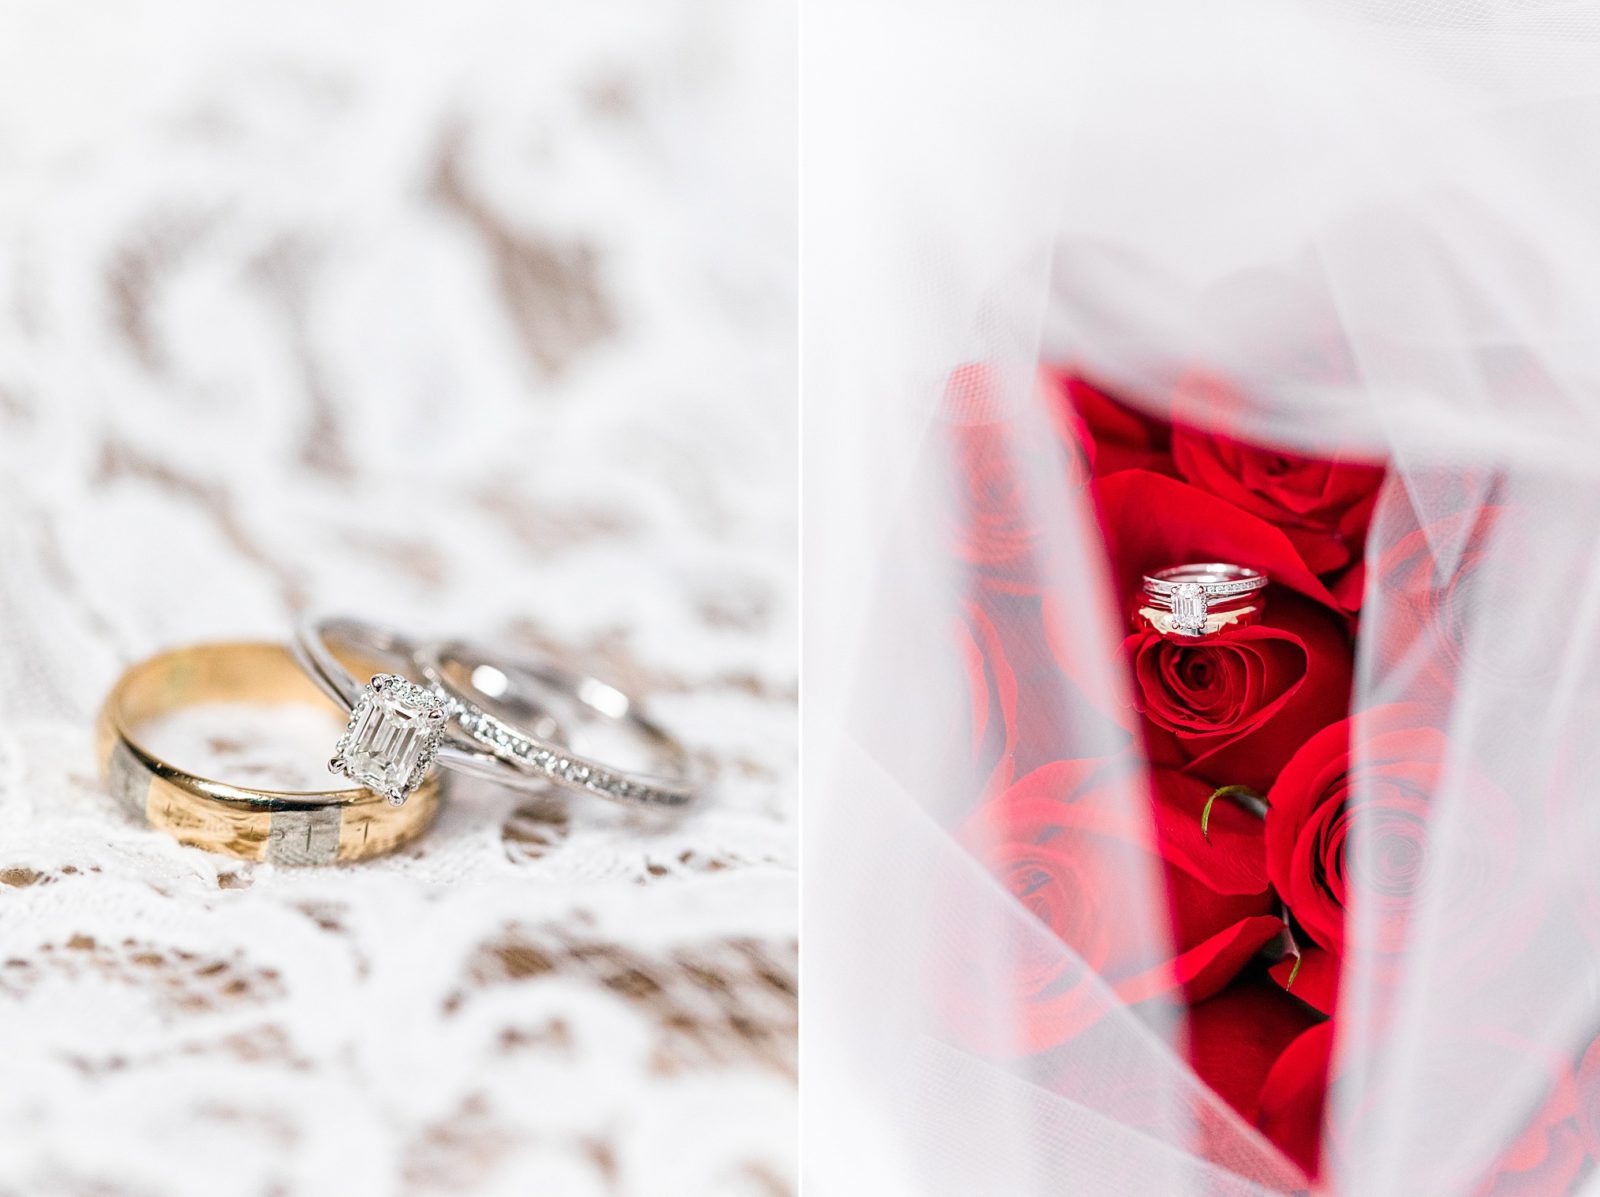
BONUS TIP FOR A UNIQUE BACKGROUND:
Get two copies of the invite and place them together, and use your macro lens and set your aperture so the focus is on the ring and the background will become creamy, dreamy and blurry!
Below is an example of this.
4. Ask your client or the florist to send some loose florals!
Again, this is a great way of incorporating the overall design of the wedding day into your detail shots for a cohesive gallery of images. Also, if your client is working with a florist, this is a GREAT way to highlight their work and build a relationship with another vendor!

5. Macro Lens
A macro lens is a must to get all the pretty little details! I use a 100mm macro lens when shooting details because the macro lens lets you get a TON of detail for all those tiny items such as the rings or the bride’s jewelry!
A list of bridal details
FOR THE BRIDE:
Now that you got in the head of your wedding photographer and why they are going to photograph these objects and details. Here is a list of items that you should have ready for your photographer when they arrive:
- Wedding Dress
- Bridesmaid Dress
- Veil or hair piece
- Rings (all three of them if possible.)
- Shoes
- Bouquets
- Jewellery
- Perfume
- Invitation Suite
Looking for how to word your wedding invite? Check out this blog post!
Here is an blog post about choosing your pre ceremony location for the best photos!
A list of grooms details
And this is the same for the Groom’s details. Here is a list of detail objects that your man should have ready:
- Groom’s Outfit
- Cuff links
- Tie or bow tie
- Pocket Square
- Belt
- Ring
- Suspenders
- Watch
- Shoes
- Boutonniere
- Cologne

Having all of these details ready will allow for the photographer to get right to work and not waste time trying to find all of these details. Win, win!
Hope this helps you wedding photographers! What tip will you use at your next wedding?


[…] Looking for what to put on your wedding invite, check out this blog post! If you are wondering what details you should bring to the pre ceremony photos, check out the list for brides and grooms here! […]
[…] Looking for tips on what details you should give your photography for pre ceremony detail photos, check out this blog post! […]